Related Posts Widget for Blogs by LinkWithin

Monday, April 06, 2009

It was a three skirt weekend.

b_day_skirt
ruffle_purple
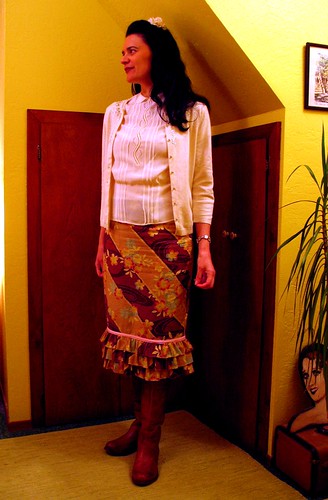
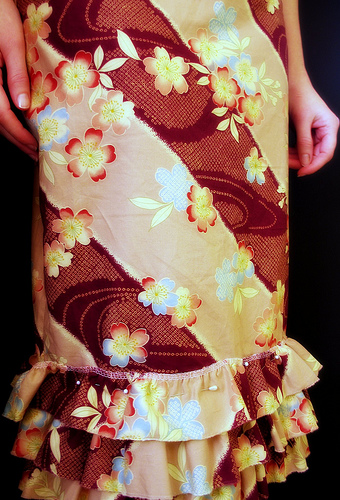
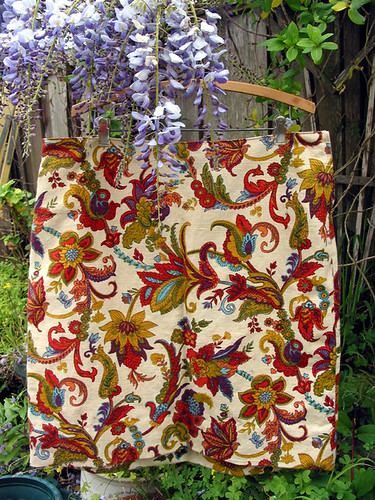
I made three skirts this weekend, one for me and two for my sister (see above). She ended up with three skirts for her birthday, though, because I also wrapped up the ruffle skirt (seen previously here). This is the ruffle skirt's debut as a finished piece. One of the skirts I made for her this weekend isn't shown yet because she hasn't taken a pic — it's the same Amy Butler fabric as the one I made for myself. I also made a grey linen tunic for me out of fabric given to me by Sonya. Whew! It was a rockin' sewing binge. Gosh, I love those.

Someday, more interesting prose. For now, this is all I've got.

Labels: ,

Thursday, March 05, 2009

Three Recent Flickr Favs

A lorimarsha Original
A lorimarsha original. Check out this little video of her atelier.

Galliano
John Galliano Spring '09, via lorimarsha.

For my Sister
My first attempt at serged ruffles — a spring skirt for my sis. It's a WIP. If you look closely you can see the pins.

Check out my other flickr favs here.

What are your inspirations?

Labels: , ,

Friday, November 28, 2008

Glue-Set Zipper Tutorial

[I'm doing a little blog organizing and finally posting this zipper tutorial that I wrote up for Sew, Mama, Sew! last year. Enjoy!]

The Pep Talk

Learning to install a zipper changed my life.

Sewing for myself gives me control of what my clothing looks like and how it fits - how empowering is that! I'm so in love with the process and result of garment making that I've been averaging about two pieces a week. I can make a skirt in a couple of hours! It all started with the book Sew What! Skirts, which was written and packaged in such a way as to tempt me to overcome my fear of the zipper foot.

Around the same time I read a blog post by a woman who had gained ten pounds over the holidays and had made herself a cute new skirt to fit her increased size. This concept rearranged my thinking. No longer was I going to wait to lose weight in order to reward myself with new clothes. I was going to draft a skirt pattern (learned from Sew What! Skirts) to fit my body as-is; choose a fabric that I love; and sew myself some tailored clothes. Custom-fitted clothing looks and feels better than off-the-rack, especially if your body shape doesn't fit the industry standards.

The ruffler foot is not the zipper foot.

I was afraid of sewing in a zipper for about 30 years because I thought my mom's ruffler foot was a zipper foot. A zipper foot is actually just a simple little foot that looks like half of a foot. One side is missing so that you can get close to the zipper teeth without bumping into them. My zipper foot (#4 Bernina) has two positions, left and right, so that you can sew up either side of the zipper. The zipper foot is not complicated and should not scare you away. The lesson here: get to know your sewing attachments, they are your friends. Be sure to read up on your own model of zipper foot.

Don't hate me because I'm a beautiful zipper.

The most difficult part of zipper installation is making it look good. With the glue-set method you eliminate most of the challenges. The process becomes quite easy. The idea behind the glue-set zipper installation is to use adhesive to hold the zipper in place, while sewing, instead of pins. This allows you to top stitch the zipper without having to wrangle with the pins. And, since you are top stitching it into place, you have more control on how it looks on the outside, thus, more chances at zipper success.

The Glue-Set Zipper Tutorial: A basic side zipper for an A-line skirt

Step 1: Rough Zipper Layout


With the front and back panels of the skirt right sides together, lay a zipper on the side seam about 1/4 inch down from the stay stitching to get an idea of where the bottom of the zipper will be. A zipper between seven and nine inches is considered normal for skirts. The shorter the zipper is the harder it will be to get over hips. Got a big back side? Use a longer zipper.

-----------------------------------------

Step 2: Mark Zipper Bottom


Place two pins at the bottom of where the zipper will end. You want these to be about where the zipper teeth end, not where the zipper fabric ends. The goal is to get as close to the zipper as possible without running your sewing machine needle into the zipper teeth or bottom closure. Continue to pin the two skirt pieces together in preparation for sewing.

-----------------------------------------

Step 3: Sew and Baste Zipper Side Seam


Starting at the bottom of the skirt, sew with a regular stitch up to the two pins that mark the bottom of where the zipper will go. At this point back tack a little for reinforcement. Continue to the top of the skirt waist with a basting stitch. These stitches will be ripped out after the zipper is installed. Press the seam flat with an iron.

-----------------------------------------

Step 4: Glue Zipper


With a regular glue stick apply glue to the right side of the zipper avoiding the zipper teeth. I have read that there are sewing adhesives, but have not tried any yet. The glue stick seems to work fine.

-----------------------------------------

Step 5: Rough Zipper Placement


Gently place the glued side of the zipper onto the pressed side seam about 1/4 inch from the stay stitching. This isn't the final placement so do not press it into the fabric.

-----------------------------------------

Step 6: Final Zipper Placement


Starting at the top of the zipper, roll the zipper into place doing your best to center the teeth along the line of the seam.

-----------------------------------------

Step 7: Set Glue


When you are happy with the placement and alignment of your zipper set the glue by pressing with an iron. Make sure it's not too hot.

-----------------------------------------

Step 8: Top Stitching (part 1)


On the right side of the fabric, with zipper foot set to the outside position, sew across the bottom of the zipper. You'll be starting at one corner and sewing across the seam to the other corner of the bottom of the zipper. Stop at this corner, leaving the needle in the fabric. Make sure that you don't hit the bottom closure of the zipper.

-----------------------------------------

Step 9: Top Stitching (part 2)


At the corner of the bottom of the zipper leave the needle in the fabric and lift foot to turn the fabric for the ascent back to the waist. You want the distance from the seam to the stitching to be as far away from the seam as you can go without running off of the zipper fabric. This is one of the challenges of the zipper. If you are too close to the zipper teeth it's harder to make a neat looking stitch. If you get to far away, your stitching falls off of the zipper, which looks bad and messes with functionality. This photo shows the distance that I normally use, I think it's about 3/8 inch from the seam. Make sure to leave the threads long enough to work in when finished.

-----------------------------------------

Step 10: Zipper Pull Work-Around (part 1)


One of the problems with putting in zippers is sewing around the bulk of the zipper pull. It tends to make for wonky stitching up at the top, with the stitching taking on a Y-shape as you sew around the pull. One way to fix this is to make the top stitch far enough away that the pull doesn't affect the stitch. Another trick is to stop short of the pull; leave the needle in the fabric; and pull the zipper down a bit, so it's behind the zipper foot.

-----------------------------------------

Step 11: Zipper Pull Work-Around (part 2)


With needle still in the fabric and the foot up the zipper is opened to move the zipper pull behind zipper foot. Put foot down and continue sewing to the top of the skirt.

-----------------------------------------

Step 12: Move Zipper Foot


Switch zipper foot to right side of the needle.

-----------------------------------------

Step 13: Top Stitch Other Side


Starting in the bottom corner of the top-stitching, place needle in fabric. Lower zipper foot and stitch along the bottom of the zipper following the previous stitches. At the corner leave the needle in the fabric. Lift foot, rotate fabric, put foot down, and top stitch up other side of zipper as before.

-----------------------------------------

Step 14: Check Zipper


After top stitching is done check the underside of the zipper to make sure that you have sewn all away around the zipper without running off of the zipper fabric. I moved the zipper pull up and down according to where I was sewing in order to avoid sewing around it.

-----------------------------------------

Step 15: Rip Out Basting


If you are happy with your top-stitching you are now done with the hard part. If the top stitching looks funky, or the stitches didn't catch the zipper, then you should probably rip out the stitches with a seam ripper and sew it again. This sounds difficult, but it's really not that hard. Once you are satisfied with your work, you get to do the fun part: ripping out the basting to reveal the zipper.

-----------------------------------------

Step 16: Pull Out Threads


Because it's so fun to rip out the basting I took another picture. Don't forget to pull out the little bits of basting thread.

-----------------------------------------

Step 17: Sew in Ends


You should now have a working zipper. If a little glue has gunked up the zipper teeth, just wash it off with a damp rag. The last step in the zipper installation is to work in the threads at the bottom of the zipper. Use a regular hand sewing needle to run the threads to the inside of the skirt, tie off, and clip excess.

-----------------------------------------


This is what my finished skirt looks like. When Kristin asked me to do a tutorial for Skirt Month I immediately thought of the glue-set zipper. As I planned the skirt and the tutorial I realized that I wasn't sure which step to start the zipper tutorial with. I ended up making a start-to-finish photographic tutorial of how I sew an A-line skirt with glue-set zipper. Since it took 47 photos to document the process I'm paring this post down to the zipper-only tutorial — a mere 18 photos. The rest of the skirt tutorial can be found in this Flickr set.
Good luck and happy sewing.
— Michelle

Labels: , ,

Tuesday, November 04, 2008

Vintage Chick

This is another made-for-Quilt-Market shirt (Simplicity 3835), although it never made the cut at the show because I felt a little too whimsical in it. It's made with what is possibly the best vintage chicken fabric of all time (thanks, Cicely) — though, this fabric is a serious rival. I wore this outfit to our preschool parent/teacher conference today and it got good reception. In my world, at least for me, this is considered "dressed up." Can I tell you how much that pleases me?

$20 target cardigan + home-sewn tunic from gifted, vintage fabric + $25 cords from the camping store + hand-knit hat + my sister's lipstick = "Dressed Up"

Labels: , ,

Monday, November 03, 2008

Nani Iro Tunics Two Ways


Part of my frantic preparation for Quilt Market was to sew as many clothes as possible — I made three shirts, a skirt, and almost a whole coat. Sure, I already have a bunch of home-sewn clothes, but they weren't fresh. I needed something new to make me feel good. So, I cut into my coveted Nani Iro double gauze fabrics and used my trusty Simplicity 5197 (Ack! It doesn't show up at Simplicity. It might be out of print.) pattern.

Photos and poses are inspired by my sister and her fashion-y flickr friends.

Labels: , ,

Sunday, July 06, 2008

I'm feeling Lomoish

quilt_skirt
I keep wanting to write up a blog post with more depth, but it just doesn't seem to happen. I think I remember the same thing last summer.

Anyhoo, today I finished this long-time (over a year) WIP — a skirt made from a flea market baby quilt. The photos were less than great, so I paid my $25 and signed up for picnik. I probably could have played around in Photoshop using the prescribed layer configuration for a Lomoish look, but sometimes it's just easier to use a Flash interface that helps you do the same thing, only easier.

Labels: , , ,

Friday, July 04, 2008

Red, White, & Blue Clothes

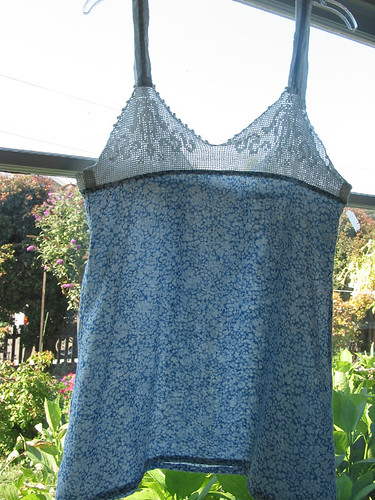
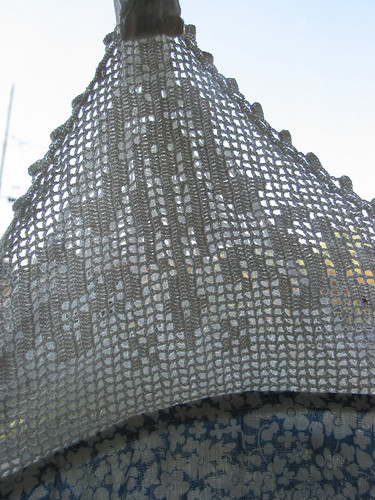
fillet_crochet_bodice_detail

fillet_crochet_bodice

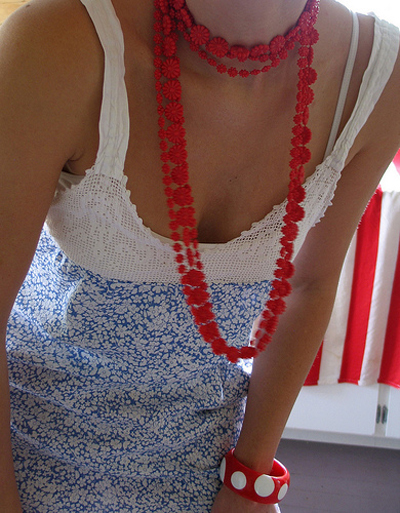
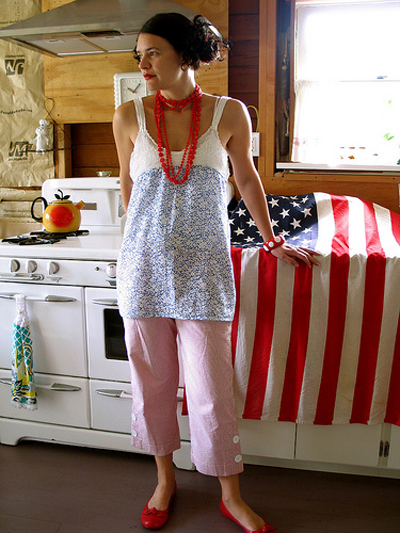
Happy 4th of July. We're just back from the World's Shortest Parade. I thought I saw Anahata Katkin, but was too shy to ask. I wouldn't mind if it was actually her, but, I have asked people before if they have a blog, and feel silly when they say no with a funny expression. Apparently it wasn't Anahata — looks like she went swimming.

The photos are of my sister modelling the shirt that I just made for her. Photos by Becktress.

Labels: , , ,

Thursday, July 03, 2008

Found Object

crochet_bodice_inside

crochet_bodice_detail

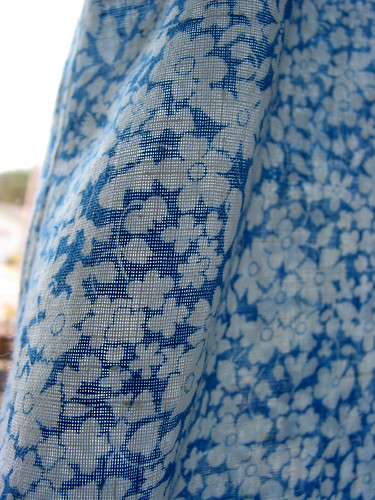
crochet_bodice_fabric_detai
I was going through my box of vintage lace the other day, looking for some trim for my future embellished tunic dress, when I found this already-been-crocheted bodice. Somehow, I didn't even know I had it — probably didn't care about crocheted bodices before I went and made some. It fit my sister, so I paired it up with some nice vintage feedsack-ish fabric and sewed it up. I used the same pattern as previously. A couple of flat fell seams and a little seam binding and it was finished. Sweet. Did I mention how much easier this was than the ones that I had to crochet myself? I can't imagine using crochet thread. It was hard enough with the yarn.

Labels: , , ,

Thursday, June 12, 2008

I Made It! Wardrobe (part 2): The T-shirt Replacement

6_shirts
Part two in the series of posts documenting sewing my own clothes over the past year-and-a-half.

These shirts are soooooo much better than my yucky old t-shirts. I just want to make more and more. This way I get to hang out with my stash on a daily basis. I've written lots more about how much I love this pattern over here.

Go over to the flickr set to see them embiggened.

P.S. I wanted to point out that on the shirts and skirts (previous post) I used a clothes pin to make the clothes fit the form better.

Labels: ,

Wednesday, June 11, 2008

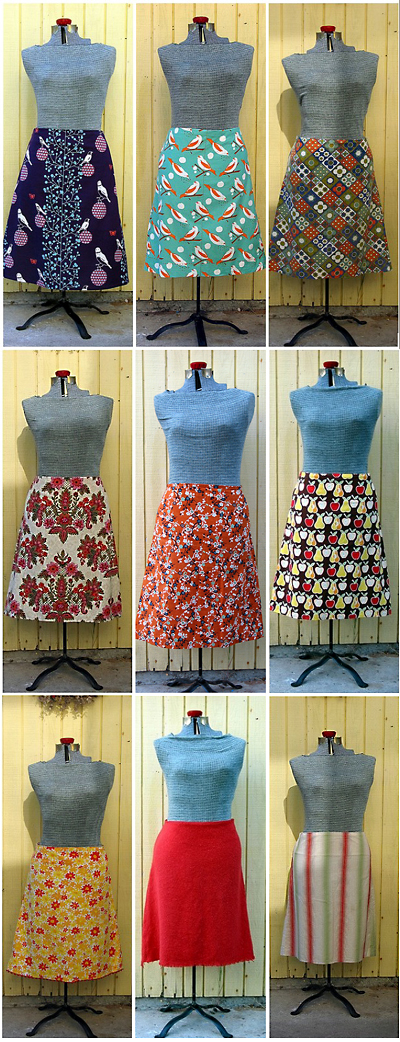
I Made it! Wardrobe (part 1): The A-Line Skirt

9_A-line_skirts_400px
Part one in a photographic series documenting sewing my own garments over the last year-and-a-half.

I'm finally at a place where — when I look in the closet, or my dresser, or the dirty clothes — I see at least several garments that I made for myself. This makes me happy. Here is the garment that started it all: the A-line skirt. After reading on several blogs about the book, Sew What! Skirts, I bought it. The way the book is written appealed to my learning style. Yes, I did want to make garments that actually fit me. The book teaches you how to draft your own skirt patterns, including zippers. And, with a little extra encouragement from my mom, I finally got over my fear of the zipper. Once you can put in a zipper, you can make just about anything. I haven't gotten past the basic A-line, because it is such a perfectly simple skirt, but there are many more skirts to try in the future. So many things, so little time.

I'm trying to gather up names for the fabrics and will post them to my A-line flickr set as I find them. Leave a comment if you recognize any.

If you haven't seen my A-line skirt and zipper installation tutorial, it's over there, too.

Labels: ,

Monday, June 09, 2008

Dress Love


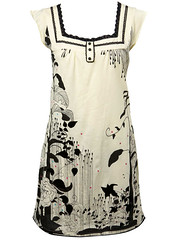
I did not make this dress—although, I wish I did—it's by Miss Selfridge.

I saw it on one of the five hundred and thirteen blogs that I read. I'm sorry, I can't remember which one. Thank you, whoever posted it. I *love* it.

I would buy the dress if they had my size, but, since they don't, I'd really like to make something similar. Now the hunt begins for a great border print: maybe a Marimekko, if I'm feeling indulgent; or, an Ikea curtain, if I'm feeling frugal; or, a hand-painted, screen-printed jobby, if I'm feeling insane.

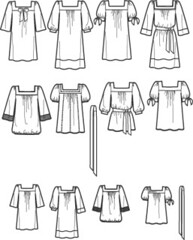
Anyone know of a similar dress pattern? Thanks to Alison's suggestion, I found Simplicity 3535 (shown in the line drawing at left) and think it could be a good starting point. A flickr friend also suggested this Japanese book (ISBN 978-4-579-1149-7) by Yoshiko Tsukiori.

I love this feeling of being inspired.

Labels: , ,

Thursday, May 01, 2008

Fancy Pants

fancy-pants
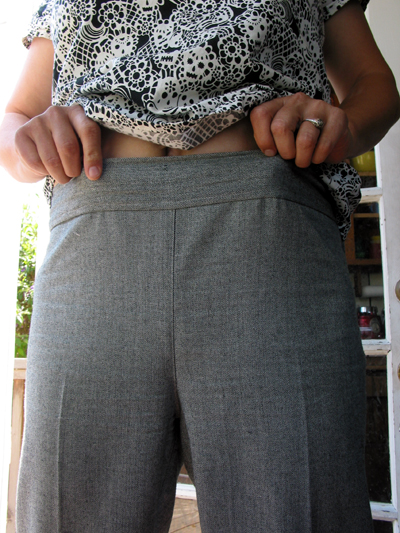
My first real life, non-elastic pants with side zipper, sewn by me.

pattern
It all started with a vintage men's pajama pants pattern.

zip
After altering the pj pattern a couple times to make it more fitted, I realized I could add a couple darts to the back, and a zipper to the side, and call it pants. I ended up adding a waist band instead of facing because I trimmed it down too low. Finally, I have pants with a waist band that fits me. It doesn't cut into my no-waist-having self.

hem
I stay stitched the hem and let the fray stay.

bumpkin
These pants were made for my San Francisco trip. And, since I always feel like a country bumpkin when in the city, I thought I'd make it a theme — frayed hem and straw hat were worn with pride.

top
Do you see a uniform emerging? A style? Yokel couture, perhaps? I made my first French seams on these bad-boy bumpkins.

akimbo
I'm feeling sassy with my made-by-me outfit.

Labels: , ,

Tuesday, April 15, 2008

Me 4.0 and Simplicity 3835

Four Top
It took me a year to finally make the Built By Wendy, Simplicity 3835 pattern. I watched as everyone made cute shirt/tunic/dress after cute shirt/tunic/dress. While thinking that it looked great on them, I wondered if it would look maternity-ish on someone my size. The pattern only goes up to bust size 40 inches and I'm 46. Fortunately I remembered that on of my vintage-but-sized-for-larger-folk patterns it explained that, if you are larger than a B-cup, it's better to measure above the breasts and around the back to get a better measurement — when I do that, I'm 42 inches. So, after holding the pattern up to my body, and getting mom's opinion, and comparing it to my other favorite home-sewn, I skipped the muslin and went straight to cute polkadot quilter's cotton.

The modifications I made were: not adding the elastic on the sleeves (too puffy); adding a little to the front fold (about a half inch); adding additional length (because I'm tall); and adding the darts in back (like the dress version).

Make sure to follow the directions for the length of the elastic for the neck opening, which seems long, but, will flatter with its peek at your collar bones.

This shirt is so much better than stained, Old Gravy T-shirts in XXL, but it serves the same purpose — it's a classic mom uniform from way back, but now you get to use all the cute fabrics. It's utilitarian. It's easy. It's stash busting. It's fast (1 1/2 to 2 hours)! It's my favorite pattern, ever!

Did I scream yet about how much I LOVE THIS PATTERN?

So, even if you have big b**bs, and even if your waist size is the same as your age*, and even if you still have that baby belly — TRY THIS PATTERN. It even looks good on skinny girls. It's all good.

--------------

*It's my 40th birthday today!!!!!

Labels: ,

Wednesday, April 09, 2008

Skirts For Others

skirt for gigi


Day 320
Originally uploaded by becktress.


Day 321
Originally uploaded by becktress.

No deep thoughts lately, just sewing. I'm playing catch up on the posting because last month I only posted four times!

The top skirt was the result of an extended playdate. Sewing *can* happen with two moms and three kids. I measured and drafted an a-line skirt for my mom-friend, Gigi; then, sewed it up with her vintage upholstery-weight linen. She helped maintain a comfortable level of sanity with the children. Barking did happen, but it wasn't the grown-ups. I finished everything except the hand-stitching while they were here.

The bottom two photos are skirts that I made for my sister for her birthday. The top one is an Amy Butler print, the bottom one is denim. The interesting thing about the denim is that it looked really frumpy when I made it her normal length of 26 inches in the front. Shortening it made it look cuter, less of a bad 70s thing. I mean, there's good 70s and there's *bad* 70s — just sayin.

Labels: ,

Friday, October 05, 2007

ROOTS


autumn2001
Originally uploaded by Green Kitchen.


Roots
Originally uploaded by Green Kitchen.


Future Farmer
Originally uploaded by Green Kitchen.
ROOTS For Reading*
Once upon a time I worked on a very fun project, called ROOT, with my friends over at Mariquita Farm. It featured Andy's writings about life as it relates to food and growing food — he's a farmer with a philosophy major. Each issue was 18 pages and included a seasonal recipe or two. I had the unique pleasure of complete artistic control; from choosing the paper (yummy French paper and a cool sparkle paper that I forget the name of), to creating the illustrations, it was all me. I also got to employ a couple friends to take photos and make images — Blaize helped edit it. We even had a testimonial from Susie Bright. ROOT fulfilled my longtime dream of collaborative creative work amongst friends. We did one issue per season for four seasons.
ROOTS For Dinner
My favorite way to use up the leftover roots from my Two Small Farms CSA box, including the ones my family doesn't like, is to dice them up small; toss them with olive oil, salt, and an herb or two; and roast them at high heat until they're caramelized bits of perfection. I think I got the idea from this book. It's a great way to get turnips and beets into people who think they don't like them.

ROOTS For Fashion
I'm horrible with laundry and/or bibs, so we have a lot of stains around here. I remember seeing a cool stain cover up over at Little Green's Flickr. So, in anticipation of dressing my baby for today's harvest festival I did a root version of stain management.
*I'm sure Julia still has copies of ROOT that she would love to sell. You can contact her at julia[at]mariquita[dot]com.
Labels: , , ,